This page is not intended to be an in-depth guide on fitting a new exhaust manifold, but notes to help our customers ensure it is fitted properly. For a detailed procedure the workshop manual should be consulted. The turbo does not have to be removed but it does make the job easier. Whether it is removed or not the turbo oil feed will need to be disconnected to allow the turbo to be moved out the way.
Ensure mating face between manifold and head is clean
Ensure manifold does not contain machining swarf – kits supplied de-webbed by us are cleaned however please check for yourself.
Ensure all threads are cleaned out with an M8 tap before fitting studs. If timeserts or helicoils have been used previously then the tap may remove these. If this happens replace the fitting before proceeding.
Don’t forget to fit the gasket! A new gasket must be used. Discard the old gasket.
Ensure manifold fits flush against the head before fitting nuts – do not use nuts to “pull” the manifold into place.
Fit studs – these should wind in pretty much fully by hand if the threads have been properly cleaned
Loosely fit the manifold and tighten the nuts to secure the manifold to the head
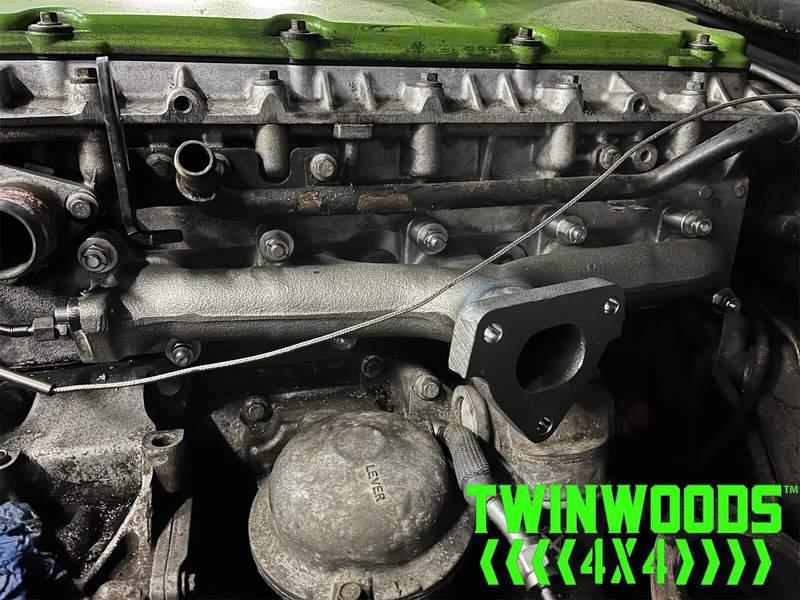
Torque the nuts to 10Nm to ensure it’s seated well, working from the centre outwards (similar to head bolts, example below)
Final torque each nut to 25Nm in the same pattern
Re-fit anything that was removed/moved to gain access
After the vehicle has been run up to operating temperature let it fully cool and then re-check torques on all nuts.